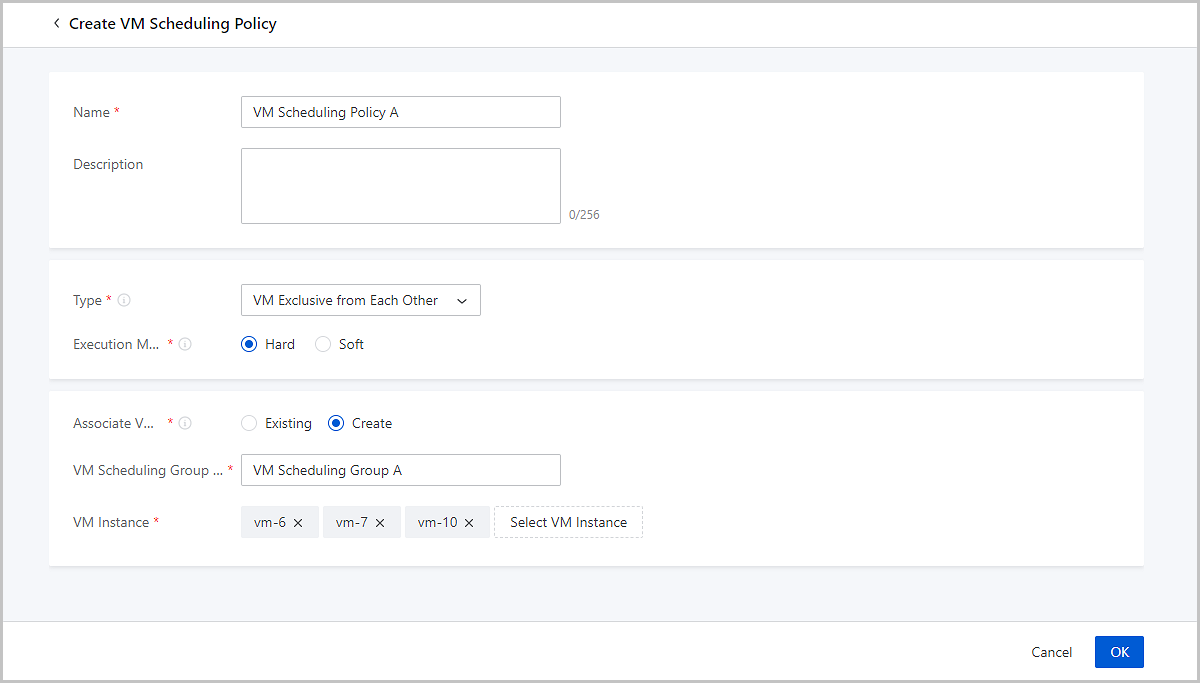
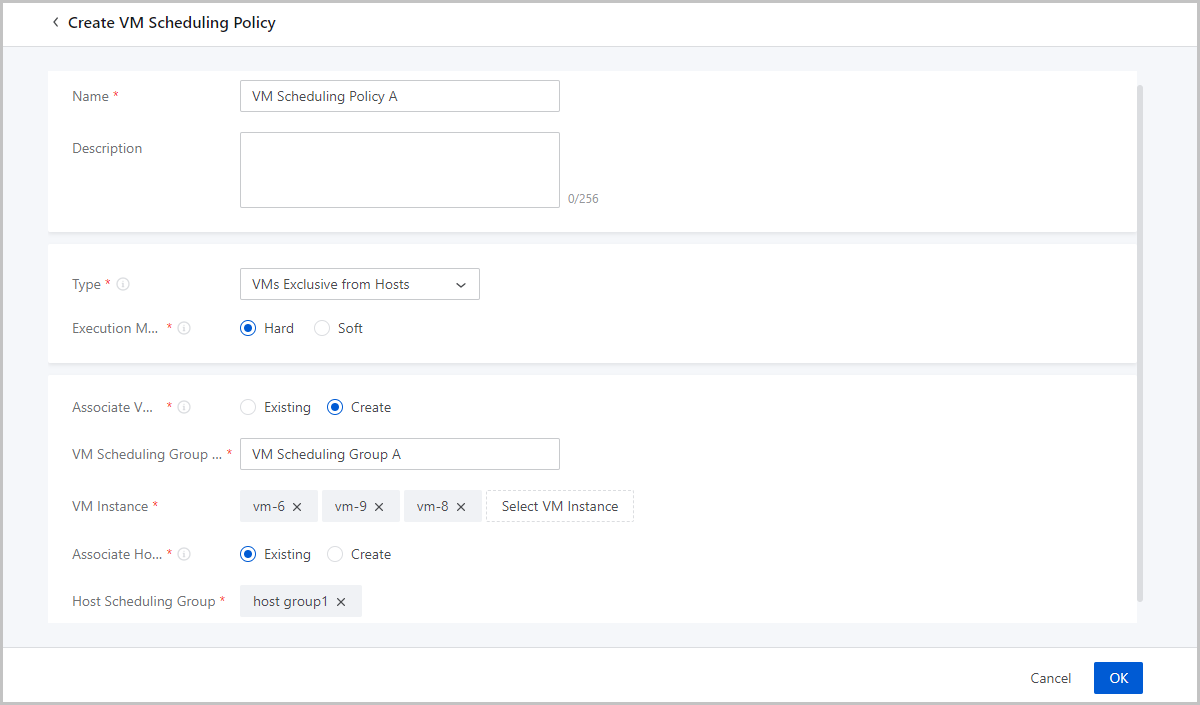
On the main menu of ZStack Cloud, choose . On the VM Scheduling Policy page, click Create VM Scheduling Policy. Then, the Create VM Scheduling Policy page is displayed.


On the main menu of ZStack Cloud, choose . Then, the VM Scheduling Policy is displayed.
| Action | Description |
|---|---|
| Create VM Scheduling Policy | Create a VM scheduling policy. |
| Edit VM Scheduling Policy | Edit the name and description of a VM scheduling policy. |
| Enable VM Scheduling Policy | Enable a disabled VM scheduling policy. |
| Disable VM Scheduling Policy | Disable an enabled VM scheduling policy. Note: If you disable a VM scheduling policy, the associated VM instances will not be scheduled based on the policy. Note: If you disable a VM scheduling policy, the associated VM instances will not be scheduled based on the policy. |
| Change Execution Mechanism | Changes the execution mechanism of a VM scheduling policy. Two mechanisms are provided: Hard and Soft. |
| Delete VM Scheduling Policy | Delete a VM scheduling policy.Note: If you delete a VM scheduling policy, the associated VM instances will not be scheduled based on the policy. |
On the main menu of ZStack Cloud, choose . Then, the VM Scheduling Policy page is displayed.
more PDFs
Email Us
contact@zstack.ioEmail Us
contact@zstack.ioThe download link is sent to your email address.
If you don't see it, check your spam folder, subscription folder, or AD folder. After receiving the email, click the URL to download the documentation.Thank you for using ZStack products and services.
Submit successfully.
We'll connect soon.Thank you for choosing ZStack products and services.

