- Account Home
- Language
- News
- Products
-
Cases
By ServiceBy Solution
- Help & Support
- Partners & Training
- About Us
- 立即下载
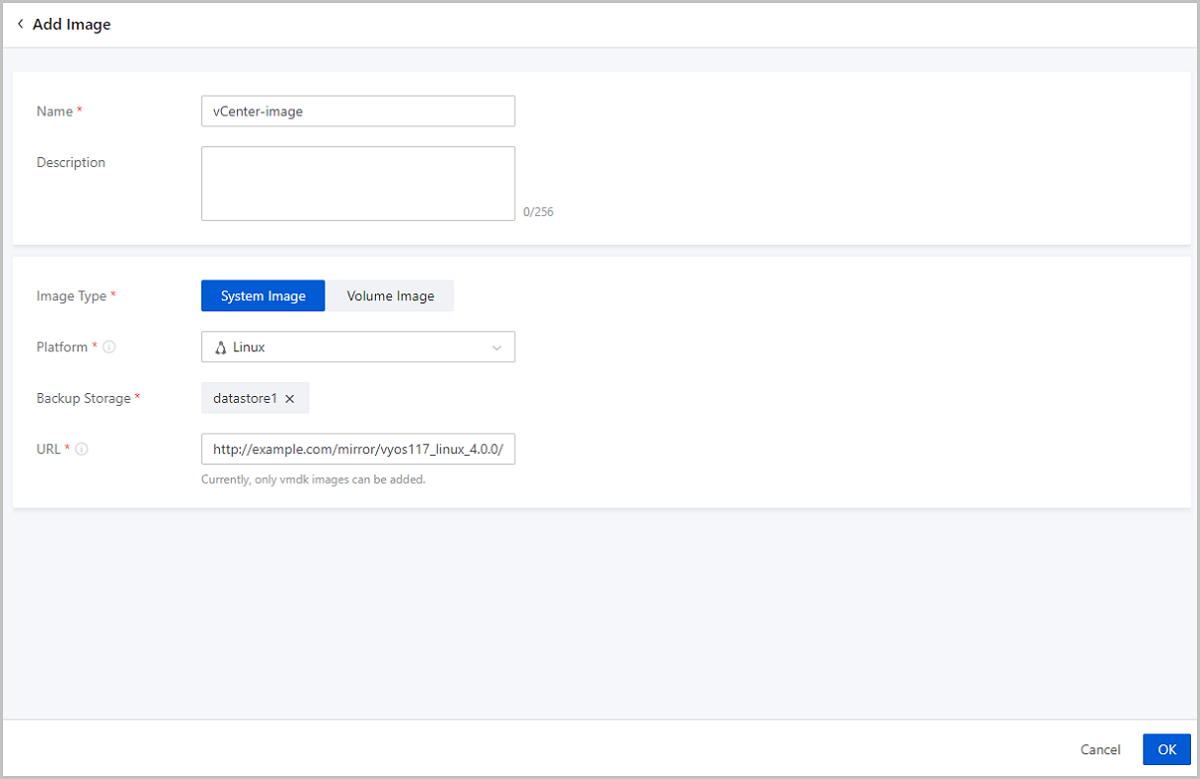
On ZStack Cloud, you can add a local image of the VMDK format to the vCenter. You can synchronize the vCenter image state between the remote vCenter and ZStack Cloud through data synchronization. You can add two types of image: system image and volume image.
This topic introduces how to Add a vCenter Image and Manage a vCenter image on ZStack Cloud.
 Note: On the main page of Add Image, choose Search and click the input box, and then you can select vCenter as the filter criteria to screen the information related to the specified vCenter.
 Note: The vCenter image name cannot be identical with the vCenter VM instance name.
 Note:
Note:  Note: You can only add the images of the VMDK format currently.
 Note: You can only add images of VMDK format currently.
On the main menu of ZStack Cloud, choose . Then the Image page is displayed.
| Action | Description |
|---|---|
| Add vCenter Image | Add a local image in the .vmdk format to the vCenter. Currently, you cannot add an image of in the .iso format. |
| Edit vCenter Image | Edit the name and the description of a vCenter image. |
| Enable vCenter Image | Enable a disabled vCenter image. After you enable the image, it serves as a backup. |
| Disable vCenter image | Disable an enabled vCenter image. After you disable the image, it no longer serves as a backup. |
| Set Sharing Mode | Set the sharing mode of a resource. The platform provides the following sharing modes:
 Note: Note:
|
| Change Owner | Change the owner of a vCenter image. Note: ZStack Cloud supports multi-account management on managed vCenters. Normal accounts and project members can use the vCenter images shared by the admin. Note: ZStack Cloud supports multi-account management on managed vCenters. Normal accounts and project members can use the vCenter images shared by the admin. |
| Delete vCenter Image | Deleting a vCenter image deletes its local records and the actual image on the remote vCenter. |
| Recover vCenter image | Recover a deleted vCenter image. The recovered image appears on the Available tab page. |
| Expunge vCenter Image | Expunge a deleted image. You can only expunge an image in the recycle bin. |
Back to Top
Email Us
contact@zstack.ioEmail Us
contact@zstack.ioEmail Us
contact@zstack.ioThe download link is sent to your email address.
If you don't see it, check your spam folder, subscription folder, or AD folder. After receiving the email, click the URL to download the documentation.Thank you for using ZStack products and services.
Submit successfully.
We'll connect soon.Thank you for using ZStack products and services.